AWS CloudFrontは、Amazon Web Servicesが提供する高速コンテンツ配信ネットワーク(CDN)です。このサービスは、世界中のユーザーに対してウェブサイトやアプリケーションのコンテンツを迅速に配信することを可能にします。
CloudFront Functionsは軽量なスクリプト実行環境を提供します。これらを利用することで、特定の条件に基づくアクセス制御やコンテンツのカスタマイズが可能になります。
CloudFront Functionsと組み合わせて使用する場合、CloudFrontのKeyValueStoresが非常に役立ちます。KeyValueStoresは、CloudFront Functionsによって行われるカスタムロジックに必要なデータを効率的に提供し、コンテンツ配信のカスタマイズをさらに強化します。例えば、特定の協力会社に対するアクセス制限の設定や、制限ルールの動的な変更がKeyValueStoresを利用することで容易になります。
また、KeyValueStoresを利用することで、小さな変更が必要な場合にCloudFront Distributionsの再デプロイを回避し、より迅速な更新と運用の効率化が実現されます。これは、特に頻繁なアップデートや動的なコンテンツ制御が求められる環境において大きなメリットを提供します。
AWS WAFと比較して、CloudFront FunctionsとKeyValueStoresは、より簡単でコスト効率の良い解決策を提供し、柔軟なウェブアプリケーションのセキュリティとパフォーマンスを実現することができます。
以下今回やってみた手順の詳細になります。
設定手順
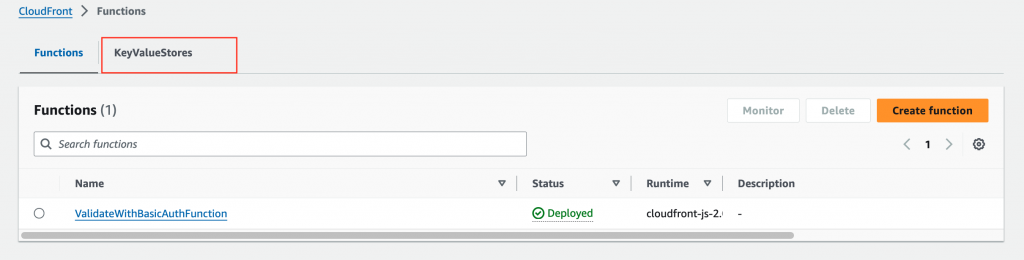
- CloudFrontFunctionを 準備します

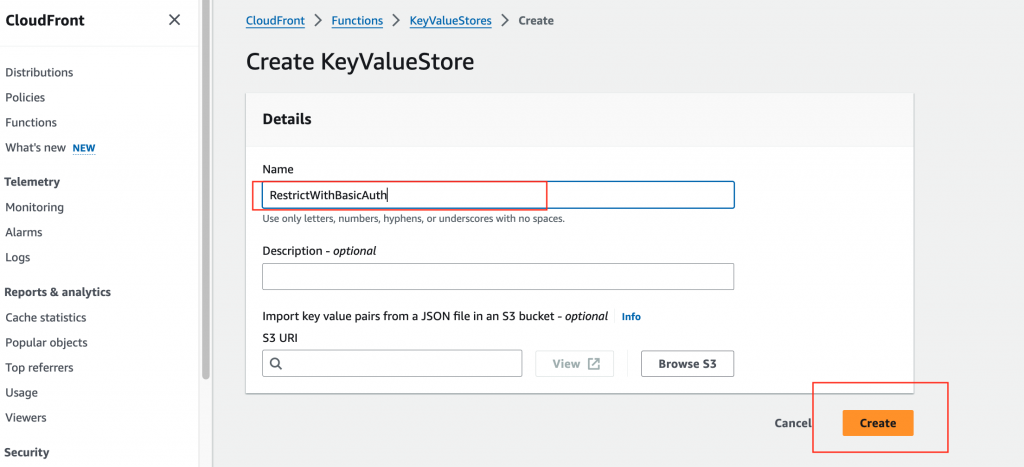
- 続いてKeyValueStoreを作成してで利用するVariableを登録します

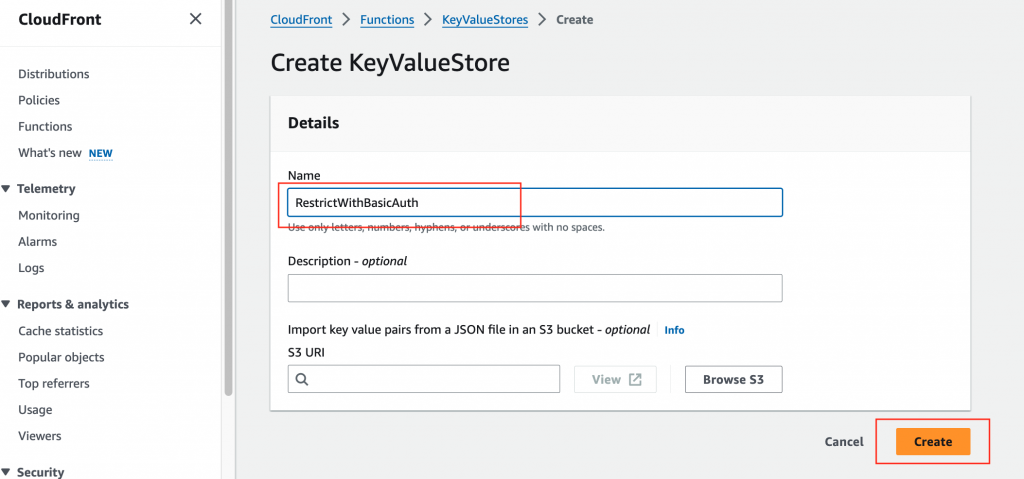
- CloudFrontFuntionsで利用するVariablesをkey valueで登録します。今回はアクセス許可するWhiteListIP、制限ユーザID/passが複数あるのでコンマ区切りで登録しておきます。

- FunctionsとKeyValueStoresを連携してコードをDevelopmentに記載します。テストして問題ないことを確認後publishします。
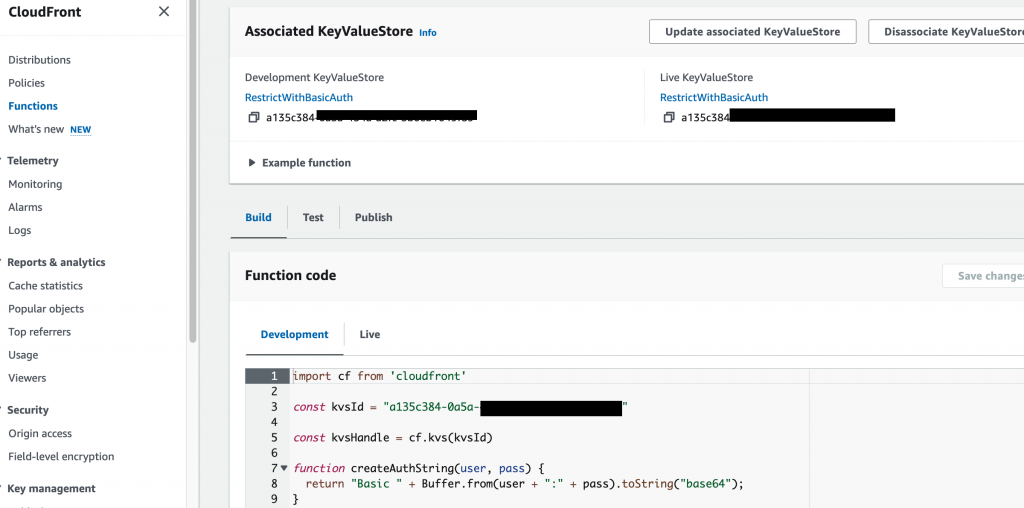
- 今回のサンプルコードが以下のようにセットしました。
import cf from 'cloudfront'
const kvsId = "a135c384-0a5c-XXXX-XXXX-XXXXXXXXXXXX" // key value store id
const kvsHandle = cf.kvs(kvsId)
function createAuthString(user, pass) {
return "Basic " + Buffer.from(user + ":" + pass).toString("base64");
}
function createUnauthorizedResponse() {
return {
statusCode: 401,
statusDescription: 'Unauthorized',
headers: { 'www-authenticate': { value: 'Basic' } },
body: "401 Authorization Required"
}
}
// Lambda ハンドラー
async function handler(event) {
const request = event.request
const headers = request.headers
const allowIpSting = await kvsHandle.get('allow_ip_list')
const authUserPass = await kvsHandle.get('auth_user_pass')
// 定数とユーティリティ関数
const allowIpList = allowIpSting.split(',')
const authUserList = authUserPass.split(',')
const authUser = authUserList[0].split(':')[0]
const authPass = authUserList[0].split(':')[1]
const authUser2 = authUserList[1].split(':')[0]
const authPass2 = authUserList[1].split(':')[1]
// 特定のIPアドレスからのリクエストをチェック
if (allowIpList.includes(event.viewer.ip)) {
return request
}
const authString = createAuthString(authUser, authPass)
const authString2 = createAuthString(authUser2, authPass2)
// 認証を要求する
if (headers.authorization && headers.authorization.value === authString) {
return request
} else if (headers.authorization && headers.authorization.value === authString2) {
if (request.uri === "/" || /restricted_path/.test(request.uri)) {
return createUnauthorizedResponse()
} else {
return request
}
} else {
return createUnauthorizedResponse()
}
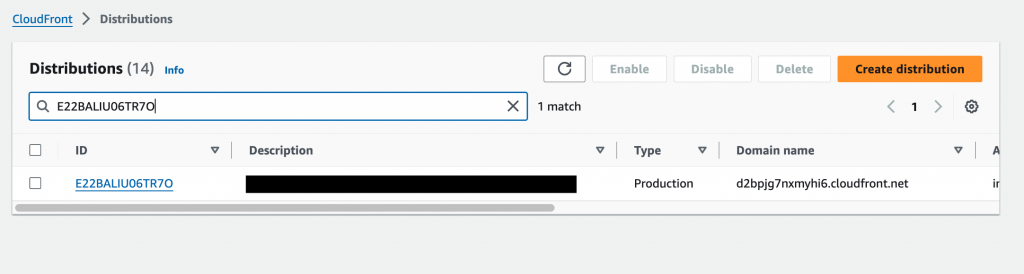
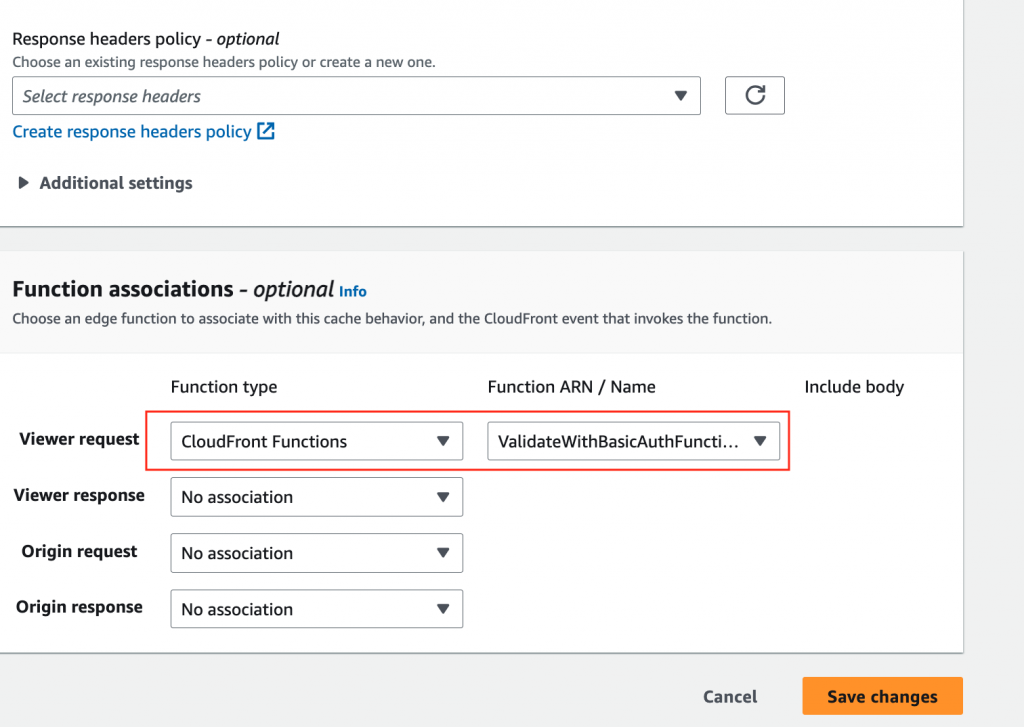
}- CloudFrontでDistributionを準備します。
- Behaviourを編集します。
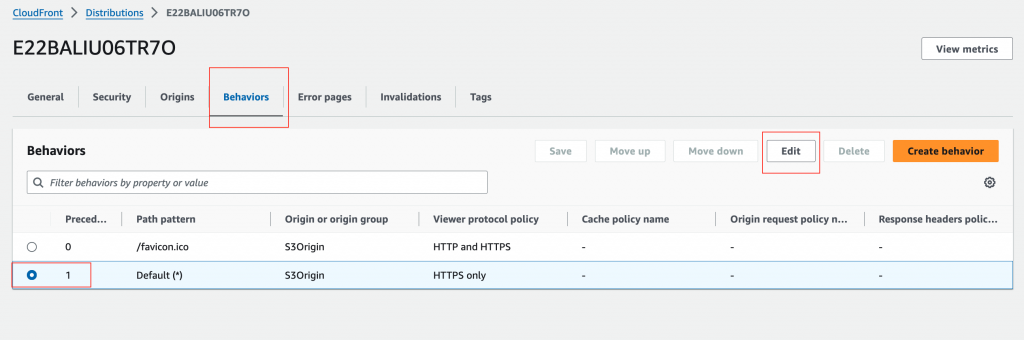
- Viewer Requestを指定します。
動作確認
- まずすべてのページへアクセス許可のIPアドレスからアクセスしてまます。
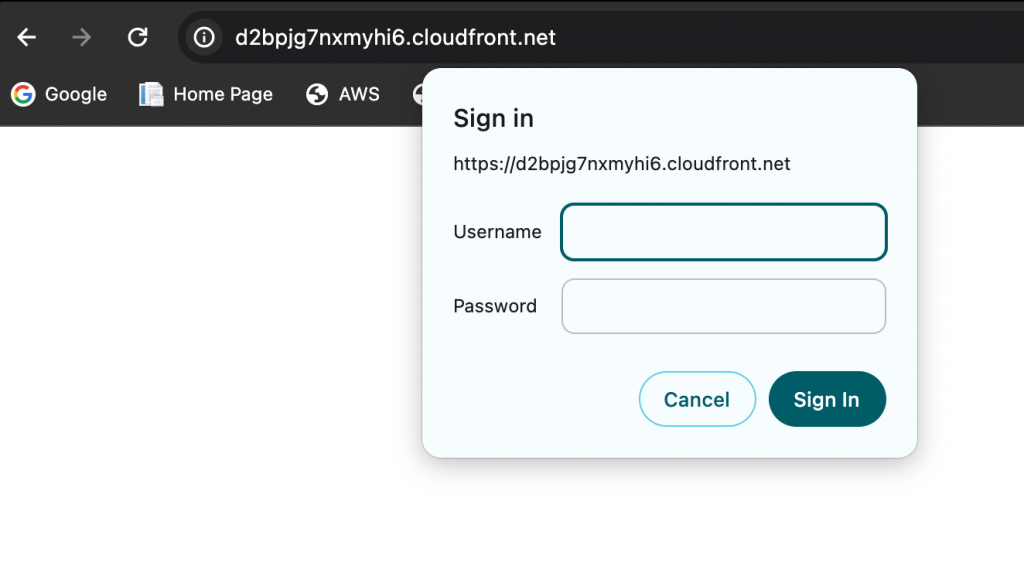
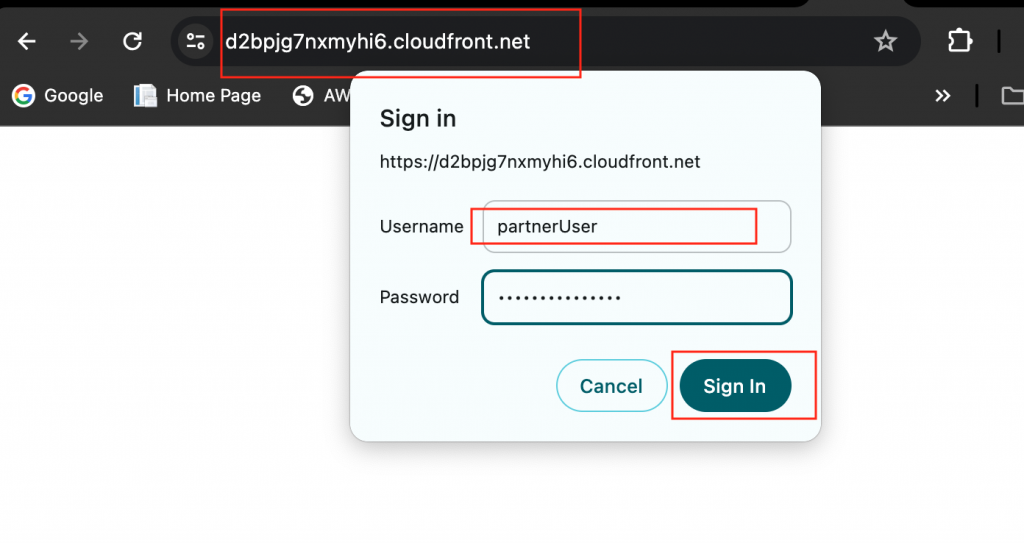
- 許可IPリスト以外のIPからのアクセスの場合以下のようにBasic認証のユーザ名・パスワード入力画面が表示される。
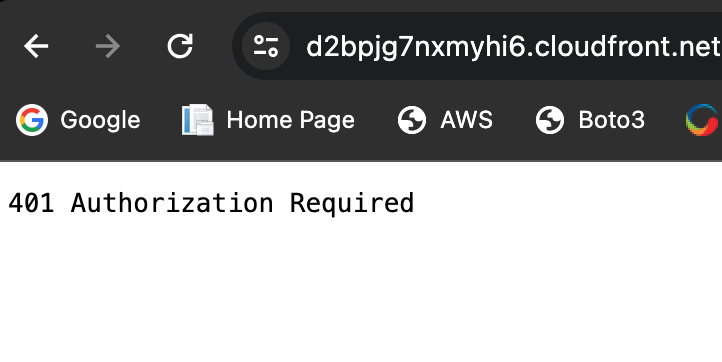
- キャンセルを押した場合以下のエラーが表示されます。
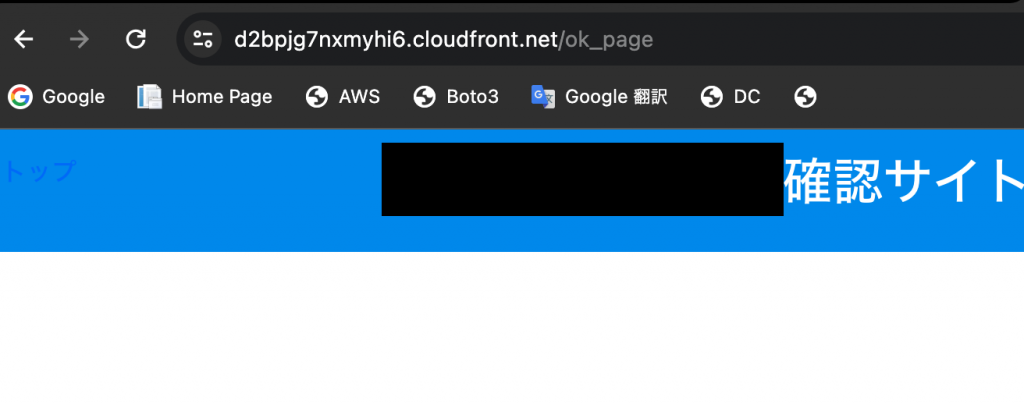
- 協力会社に許可されたページへBasic認証のユーザ名・パスワードを入力してアクセスしてみる。
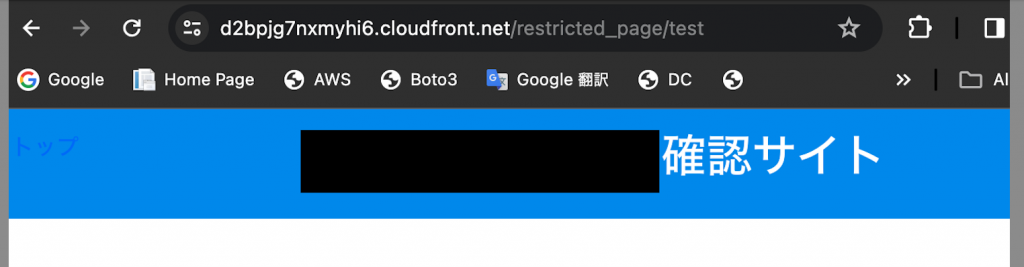
- 協力会社に許可されてないページへBasic認証のユーザ名・パスワードを入力してアクセスしてみる。sign in をクリックしてもまた同じBasic認証のユーザ名・パスワードを入力画面へ遷移されます。
まとめ
AWS WAFは高度な保護機能を提供しますが、その利用にはコストが伴います。一方で、CloudFront Functionsには無料枠があり、追加料金なしで基本的なアクセス制御が可能です。したがって、プロジェクトの要件と予算に応じた最適な選択を行うことが重要です。さらに、KeyValue Storesと組み合わせることにより、更新と運用の迅速化と効率化が実現されます。
